Table of Content
Introduction: The High Cost of Faucet Corrosion
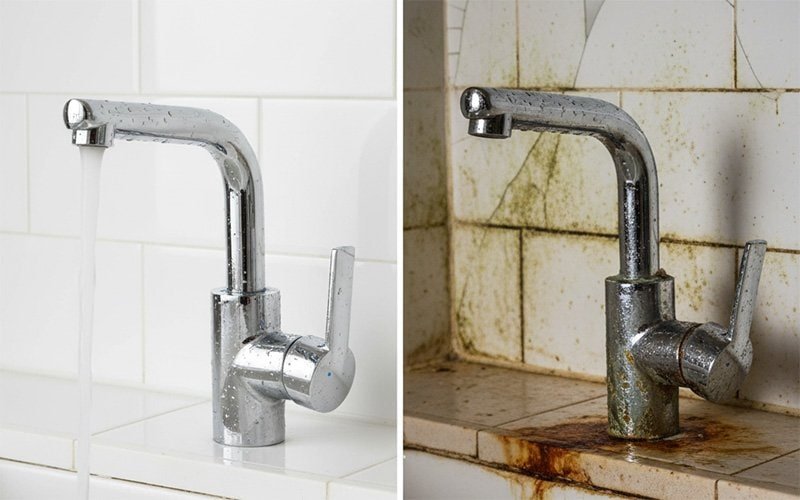
A brownish-red stain on a bathroom faucet is often seen as just a cosmetic issue. However, this discoloration can be a sign of an active chemical process that may lead to damage and other issues. Corrosion can indicate deeper structural decay and may be a symptom of broader plumbing problems.
This guide intends to provide homeowners with information to help diagnose, treat, and prevent faucet corrosion. The goal is to assist in keeping fixtures functional for their expected lifespan. With routine care, a faucet may last 15 to 20 years or more, making proactive maintenance a useful practice.
Why Act Quickly
Addressing rust and corrosion is a multi-faceted issue. The oxidation process can weaken the faucet’s material, which could affect its structural integrity and contribute to poor water flow, drips, and leaks. A persistent leak may cause water damage to vanities and flooring.
Water flowing through rusty pipes or fixtures can pick up excess iron.10 This iron-rich water can also harbor certain types of bacteria.
Additionally, rusty water can impart a metallic taste to drinking water and cooked foods. It may also leave brownish-red stains on sinks and toilets and can discolor laundry. Addressing a small rust spot when it appears is one way to prevent it from developing into a more complex issue.
Step 1: Diagnosing the Source (Internal vs. External Rust)
Before starting any treatment, it is useful to determine the origin of the corrosion. The rust on a faucet can be a localized issue or a symptom of a larger problem within the home’s plumbing. Distinguishing between these possibilities is a key step in finding a solution.
Surface Corrosion vs. Internal Plumbing Failure
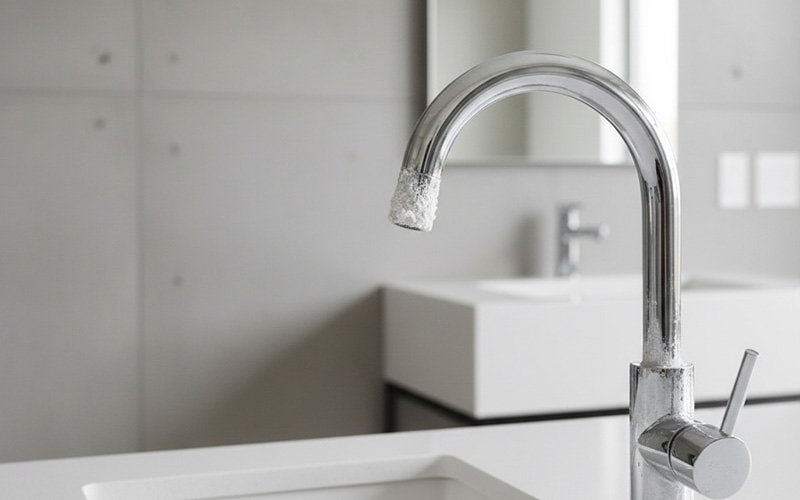
A visual inspection is the first step. Homeowners can examine their fixtures for signs of surface corrosion, such as brownish-red rust, green or white chalky deposits, and any peeling or bubbling of the finish.
The surface may also feel rough, a condition known as pitting. These signs often point to external factors like humidity, water splashing, or hard water mineral deposits.
Internal corrosion presents differently. The primary symptom is often rusty water coming out of the faucet, rather than visible rust on it. This suggests that the corrosion is occurring upstream, possibly within the home’s pipes or a failing water heater tank.
The Water Test: Pinpointing the Internal Culprit
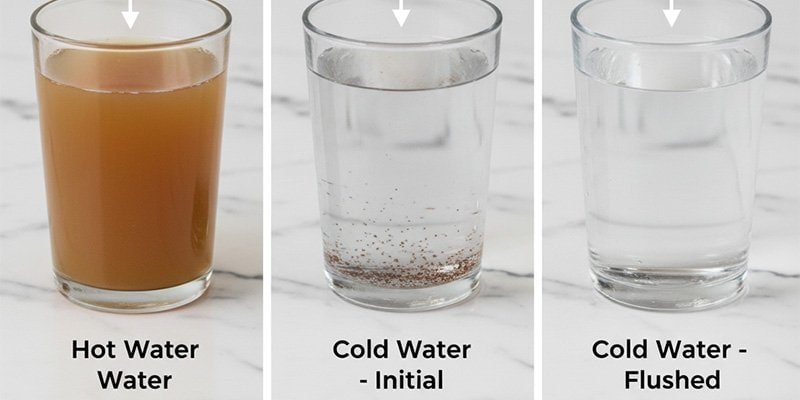
To help diagnose an internal rust source, homeowners can perform a “hot vs. cold water test.” Heat can accelerate many chemical reactions, including oxidation.
A water heater maintains a large volume of water at a high temperature, which can create an environment for accelerated corrosion if its protective systems are compromised.
The method is as follows:
- Select the faucet where rusty water was first noticed.
- Using a clear glass, run only the cold water for a few seconds and fill the glass. Observe the water for reddish-brown coloring or a metallic odor.
- Let the cold water run for 30 to 60 seconds, then fill a second glass and compare its clarity to the first.
- Turn off the cold water and run only the hot water. Fill a third glass and observe its color and smell.
This test can yield one of three results:
- Result 1: Rust Only in Hot Water. If the cold water is clear but the hot water is discolored, this suggests the water heater tank may be corroding from the inside.
- Result 2: Rust in Cold Water (Clears After Seconds). If the first glass of cold water is rusty but the second is clear, this suggests the corrosion may be in a section of the home’s plumbing. When water sits in the pipe, it can pick up rust particles that are flushed out with the initial flow.
- Result 3: Continuous Rust in Both Taps. If both hot and cold water run rusty and do not clear up, the problem may originate outside the home, such as in the municipal water main. In this case, contacting the local water authority is a recommended step.
Step 2: Understanding the Root Causes of Surface Corrosion
When the issue is identified as surface corrosion, the next step is to understand the environmental, chemical, and material factors causing the faucet’s finish to degrade.
Exposure and Chemical Attack
High Moisture and Condensation
The bathroom environment has high humidity. Water vapor, condensation, and splashes provide the electrolyte for oxidation to occur.12 Poor ventilation can trap moisture, allowing water to sit on the faucet’s surface.
Hard Water Deposits
“Hard water” contains a high concentration of dissolved minerals like calcium and iron. When this water evaporates, it leaves behind mineral deposits known as limescale.
These deposits can trap moisture against the surface, creating areas where corrosion can begin.
The Harsh Chemical Threat
Many common household cleaners contain chemicals that can be destructive to metal finishes. Abrasive powders can create micro-scratches.
Cleaners containing bleach or ammonia can be particularly damaging. Ammonia is known to be aggressive toward brass and can strip away protective plating.
Material and Installation Failures
Compromised Protective Coatings
Most faucets consist of a base metal, like brass or a zinc alloy, plated with a protective layer. Scratches, dents, or normal wear can create an opening in this plating.
Moisture can then seep underneath and cause the plating to bubble and peel away.
Poor-Quality Materials
Less expensive faucets may use lower-quality zinc alloys or thinner plating. These materials are often less resistant to corrosion.
Galvanic Corrosion (The Dissimilar Metals Threat)
This form of corrosion occurs when two different types of metal are in contact with each other in the presence of water, creating a small electrochemical reaction. One metal, the anode, corrodes at an accelerated rate.
This can happen when steel washers are used with a brass faucet or when new copper pipes are connected directly to old galvanized steel pipes.
This reaction can cause parts to fuse, making future repairs difficult.
Leaking or Dripping Water
A constantly dripping faucet provides a persistent source of moisture, which can speed up both oxidation and the formation of hard water deposits.
Step 3: Removing Existing Rust and Stains (DIY Guide)
For surface corrosion, homeowners can often address the issue themselves. It is advisable to start with the least aggressive method to avoid damaging the faucet’s finish.
A Homeowner’s Firsthand Experience
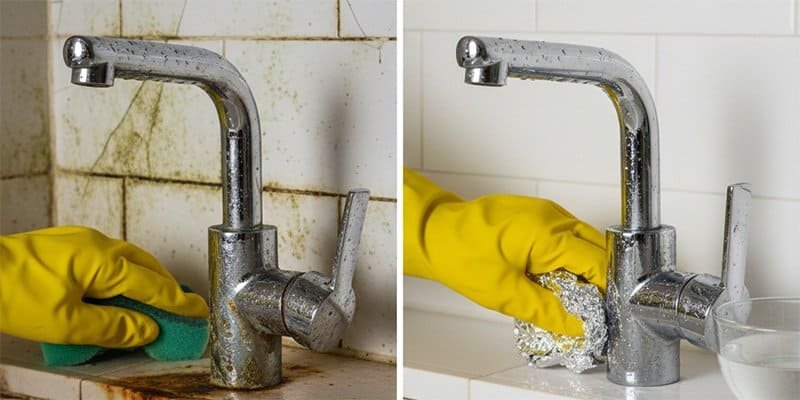
“I noticed some light rust forming around the base of my guest bathroom faucet, which doesn’t get a lot of use. I was hesitant to use harsh chemicals. I remembered reading about using aluminum foil, so I gave it a try.
I crumpled up a small piece of foil, dipped it in water, and gently rubbed the rust spots. To my surprise, the rust started to lift away with very little effort, and it didn’t scratch the chrome at all. It was a simple and effective fix for a minor problem.”
Gentle Household Remedies (For Mild Rust)
Baking Soda & Vinegar Paste
Baking soda is a mild abrasive. A paste can be made by mixing it with water. Adding a few drops of white vinegar can create a fizzing reaction that helps dissolve rust particles.
Apply the paste, let it sit for 10-15 minutes, and then gently scrub with a soft cloth.
Lemon Juice & Salt
The citric acid in lemon juice can help break down rust. Sprinkle salt over the rusty area, then squeeze lemon juice on top. Let it sit for several hours before gently scrubbing.
Aluminum Foil Method
This technique uses a chemical reaction and mechanical action. Crumple a piece of aluminum foil, dip it in water or white vinegar, and gently rub it over the rust spots.
Aluminum is a softer metal than chrome plating, so it can polish away rust without typically scratching the finish.
Commercial and Abrasive Options
Commercial Rust Removers
Products like CLR and Evapo-Rust are formulated to dissolve heavy mineral deposits and rust stains.1 It is important to follow the manufacturer’s directions, wear protective gear, and ensure good ventilation. Always test the product on a small, hidden area first.
Abrasive Scrubbing
Tools like a pumice stone or fine-grade steel wool should be used as a last resort. A wet pumice stone can be used on porcelain sinks but may scratch most metal faucet finishes.
Safety Note
Chemical cleaners should not be left in contact with fixtures for longer than the recommended time, as this could cause damage to the finish. For example, CLR suggests a contact time of no more than two minutes.
Step 4: Repair vs. Replacement and Navigating Warranties
After cleaning, a homeowner must decide whether to repair or replace the faucet. This decision can depend on the extent of the damage and the age of the fixture. It can also be useful to check the manufacturer’s warranty.
When Replacement is an Option
Extensive Corrosion
If rust has created deep pits, the finish is peeling in large sections, or the faucet has persistent leaks, the fixture may be nearing the end of its functional life.
Age of the Faucet
Many faucets have a functional lifespan of 15 to 20 years. Beyond this age, finding replacement parts can be difficult.
Frequent Repairs
If a faucet requires constant repairs, the cumulative cost and time may suggest that a replacement is a more practical choice.
Irreparable Internal Source
If the “Water Test” revealed a corroding water heater or aging pipes, replacing the faucet alone will not solve the underlying problem.
Leveraging Your Faucet Warranty
Before purchasing a new faucet, it’s worth investigating the warranty on the current one. Many major faucet manufacturers offer warranties that may cover the finish and function for the original purchaser.
A faucet with a corroded finish might be eligible for replacement parts or a new unit.
Identifying the brand is the first step:
Clean and Inspect the Faucet
Clean the faucet to look for a logo, which is often on the base of the spout, on the handle cap, or on the pop-up drain stopper.
Check Under the Sink
Look for a tag on the water supply lines that may contain the manufacturer’s name and model number.
Examine the Cartridge
With the water supply turned off, the handle can be removed to inspect the internal cartridge. The cartridge often has a part number or a distinctive shape and color that can be used for online identification
Count the Splines
The top of the faucet stem, called the broach, has a series of “splines” or teeth. Different manufacturers use a specific number of splines, which can help identify the brand through online guides.
Installation Practices
Use Appropriate Sealants
Creating a waterproof barrier at the base of the faucet is important. The choice between plumber’s putty and silicone sealant depends on the countertop material, as using the wrong one can lead to staining.
Preventing Galvanic Corrosion
Using plastic or nylon mounting nuts instead of metal ones can help prevent galvanic corrosion by electrically isolating the faucet’s metal components.
Address Leaks Immediately
After installation, check all connections for drips. A leak can indicate a worn or improperly seated part, like a washer or O-ring, which should be addressed to prevent constant water exposure.
Step 5: Long-Term Prevention and Maintenance Routines
Effective long-term prevention involves controlling the faucet’s environment, making informed material choices, and managing water quality.
Environmental Control
Keep It Dry
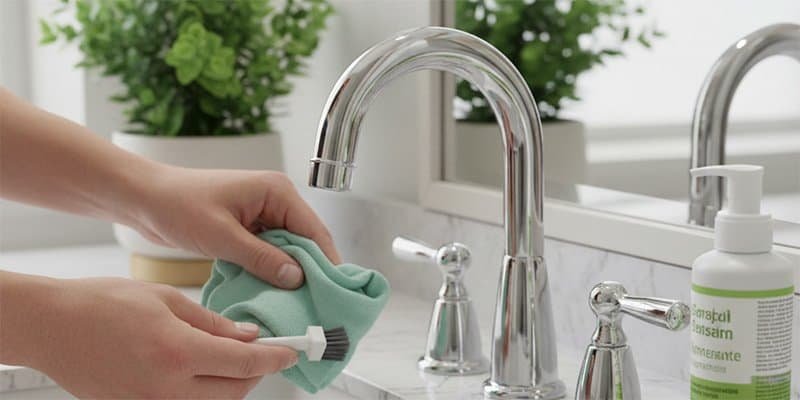
Wiping the faucet with a dry cloth after use can prevent water from sitting on the surface, which helps to stop both oxidation and mineral deposit formation.
Improve Ventilation
Using a bathroom’s exhaust fan during and after showers helps to vent moist air outside. Opening a window can also be effective. In very humid environments, a dehumidifier can help control moisture levels.
Material Selection and Protection
Choose Corrosion-Resistant Faucets
When purchasing a faucet, consider materials known for their durability. Solid brass (especially with a chrome plating) and stainless steel are often recommended for their resistance to rust and corrosion.
Apply Protective Coatings
An additional protective layer can offer defense against moisture.
- Quick Method: Applying a thin coat of automotive carnauba wax to the faucet every month or two can create a surface that causes water to bead up and roll off.
- Durable Method: For a more lasting solution, specialized clear coatings designed for metal, such as Nyalic, can be applied to seal and protect the surface.
Water Quality Management
Install a Water Softener
For homes with hard water, a whole-house water softening system can remove minerals like calcium, magnesium, and dissolved iron through a process called ion exchange.
This addresses a common cause of limescale buildup and rust staining. For very high iron levels, a dedicated iron filter may also be useful.
Anode Rod Maintenance (Water Heaters)
Inside every tank-style water heater is a “sacrificial anode rod,” typically made of magnesium or aluminum.
This rod is designed to attract corrosive elements, corroding away to protect the steel tank. This rod should be inspected every one to three years and replaced when it is significantly depleted, which is often every three to five years.
Regular inspection is particularly relevant for homes with water softeners, as softened water can sometimes accelerate anode rod corrosion.
Use Non-Abrasive Cleaners
For routine cleaning, mild soap and warm water with a soft cloth are sufficient for most faucets and will help preserve the factory finish.
Frequently Asked Questions
Related Posts


